Functions of Beakers: Why Every Laboratory Needs This Essential Tool
Understanding the Beaker
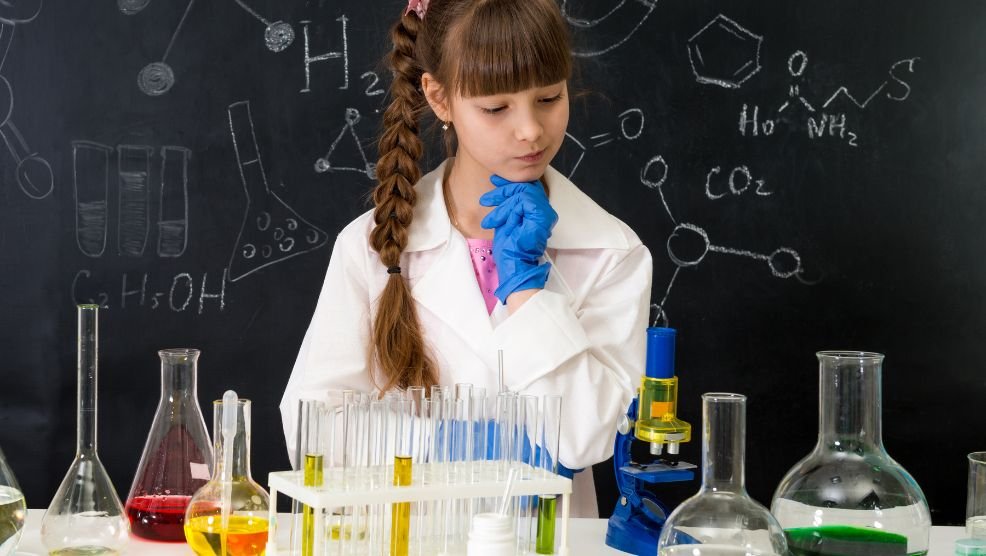
A beaker is a simple yet vital tool in any laboratory. It is used for mixing, heating, and measuring liquids. The shape is cylindrical with a flat base and a small spout for pouring. The beaker meaning is clear—it is designed to make experiments safe and efficient.
Most beakers are made of borosilicate glass or plastic. Each type serves a different purpose depending on your experiment. The glass beaker is heat resistant and chemical resistant, making it perfect for both school and industrial labs.
When you handle a beaker, you interact with one of the oldest and most trusted tools in scientific study. Every scientist, student, and researcher uses it to prepare, test, or heat materials.
The Structure of a Beaker
A beaker looks simple but every part has a purpose. Understanding each part helps you use it properly.
- Mouth: Wide for easy mixing and adding chemicals.
- Spout: Allows controlled pouring without spills.
- Graduations: Marked lines on the side for measuring volume.
- Base: Flat bottom for stability on the lab bench.
- Material: Usually glass, plastic, or metal.
Each of these parts contributes to safety, accuracy, and comfort during lab work.
Beaker Diagram
A beaker diagram helps students and beginners identify these parts visually. In a beaker diagram, you can see labels showing where the spout, graduations, and base are located. It simplifies learning and helps you remember the structure during experiments.
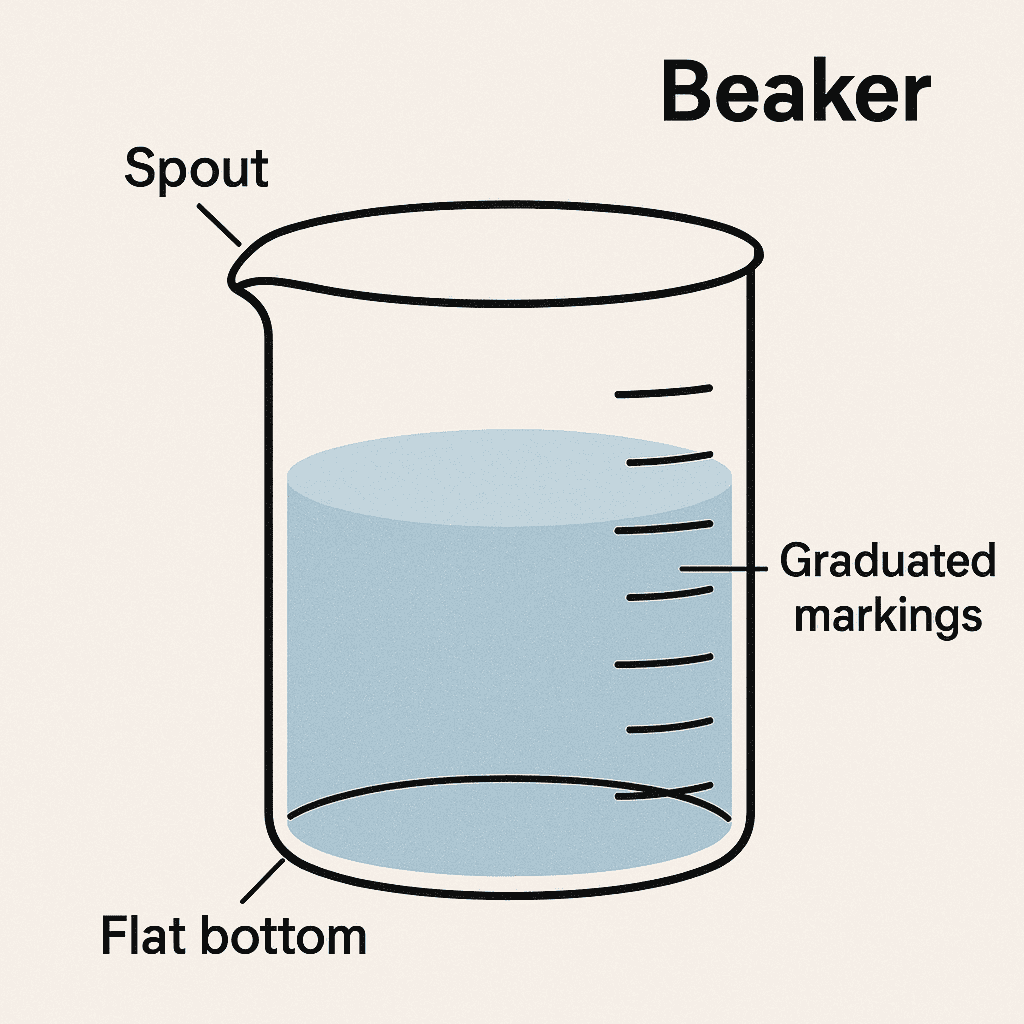
Teachers use the beaker diagram in science books and classroom charts. It’s one of the first things introduced in chemistry lessons.
Types of Beakers
Every laboratory needs multiple types of beakers. The material, shape, and purpose determine which one you should choose.
1. Glass Beaker
The glass beaker is the most common type. It resists heat and chemical corrosion. You can heat it directly on a Bunsen burner or hot plate. It also provides clear visibility of liquids during reactions.
2. Plastic Beaker
Used for mixing or measuring non-corrosive liquids. Plastic beakers are lightweight and ideal for quick classroom experiments.
3. Low Form Beaker
Short and wide. Used for mixing and heating.
4. Tall Form Beaker
Long and narrow. Used when precise volume measurement is needed.
5. Beakers with Lids
These prevent contamination and evaporation. Useful for long-term chemical storage.
Beaker Sizes and Measurement
Beakers come in many sizes ranging from 10 ml to 5000 ml. The graduations on the side show approximate volumes. For accurate measurements, always use a measuring cylinder.
Still, beakers are good for quick volume checks, especially during solution preparation.
When you study a beaker diagram, you’ll notice the measurement lines are evenly spaced, making it easier to estimate the volume at a glance.
Beaker Meaning in Laboratory Context
The beaker meaning goes beyond being a simple container. It represents practicality and consistency in lab work. Scientists use it to create chemical reactions safely, mix solutions smoothly, and observe color changes easily.
It’s used across fields such as chemistry, biology, physics, and medical testing. Whether it’s dissolving salts or heating water, a beaker supports almost every stage of an experiment.
Common Uses of a Beaker
Beakers serve multiple roles in laboratories. Here are the most practical uses:
- Mixing chemical solutions
- Heating liquids on burners
- Measuring approximate volumes
- Preparing reagents or samples
- Collecting and transferring liquids
- Cooling heated solutions
- Holding samples during reactions
A glass beaker is preferred when heat or chemicals are involved. Plastic beakers work best for low-risk mixing tasks.
How Beakers Are Used in School Labs
In school laboratories, a beaker helps students understand basic science. Teachers demonstrate reactions, such as dissolving salt in water or mixing acids and bases.
Students often draw beaker drawing diagrams in lab manuals. The beaker drawing helps them identify parts and label structures correctly during experiments.
Beaker Drawing and Educational Value
A beaker drawing helps new learners grasp the tool’s structure and function. It visually shows where the graduations and spout are located. Teachers use these drawings to explain pouring techniques, measurement marking, and safe handling.
Students can also use a beaker drawing to compare different sizes or materials. It’s a simple learning exercise but highly effective.
Value of Beaker Images
A beaker image helps you visually recognize the difference between beakers and other containers like flasks or test tubes. By studying a beaker image, you can easily remember its shape and proportions.
Laboratory catalogs, online stores, and textbooks often include clear beaker image references. They guide students in selecting the right beaker size and type for specific experiments.
Risk Management Procedures While Using Beakers
Safety is a must in every laboratory. Follow these rules when handling beakers:
- Always wear gloves and safety goggles.
- Do not heat a glass beaker with cracks or chips.
- Use tongs for handling hot beakers.
- Avoid filling liquids to the brim. Leave space for mixing.
- Clean beakers immediately after use.
- Store dry beakers upside down to avoid contamination.
These small steps prevent spills, burns, and chemical exposure.
Cleaning and Upkeep
Cleaning a beaker properly extends its life and ensures reliable results.
Step 1: Rinse with tap water after each use.
Step 2: Use a brush for tough residues.
Step 3: Wash with mild detergent and rinse with distilled water.
Step 4: Air-dry or place in a drying cabinet.
Avoid using metal scrubbers on glass beakers to prevent scratches. For plastic beakers, use soft sponges only.
Advantages of Using Beakers
A beaker is preferred in labs for many reasons:
- Simple design
- Easy to clean
- Suitable for multiple uses
- Heat and chemical resistant (for glass types)
- Inexpensive and widely available
- Clear markings for measurements
This combination of benefits makes it a staple item in every laboratory worldwide.
Why Glass Beakers Are Popular
The glass beaker is a global standard in scientific labs. Borosilicate glass is resistant to sudden temperature changes, preventing breakage during heating or cooling. It also provides transparency, allowing users to see reaction progress directly.
Unlike plastic, a glass beaker does not absorb stains or odors, ensuring pure results every time.
Beakers in Chemical Reactions
In chemistry labs, a beaker plays a role in reaction control. It helps you monitor chemical interactions safely. You can heat, stir, and mix substances while observing changes in color or temperature.
Beakers are often paired with stirring rods and thermometers. When used correctly, they maintain safety and consistency during experiments.
Beakers in Biology Labs
In biology, beakers are used for preparing culture media, washing biological samples, and mixing solutions. The beaker meaning here connects directly to maintaining sterile and clean liquid handling.
Researchers use glass beakers because they withstand autoclaving, a process that sterilizes equipment under high heat and pressure.
Beakers in Physics and Environmental Science
Physics labs use beakers to hold water for thermal experiments or density tests. Environmental scientists use them to collect and test soil or water samples. The beaker diagram often appears in their reports to describe the experimental setup.
Choosing the Right Beaker
When selecting a beaker, consider these points:
- Purpose: Heating, mixing, or storing?
- Material: Choose glass beaker for heat, plastic for light use.
- Size: Use smaller beakers for precision, larger for mixing.
- Graduations: Ensure they are visible and clear.
This approach ensures the beaker fits your experimental needs.
Beaker Sets for Labs
Schools and institutions often buy beaker sets. These sets include multiple glass beakers of various sizes, helping students learn about volume and proportion.
Each beaker image in catalogs displays size and capacity details. It allows teachers to plan practical experiments effectively.
How to Handle Beakers Safely During Heating
Heating a beaker requires care. Follow these practices:
- Place the beaker on a wire gauze or tripod stand.
- Never heat a beaker directly on a flame without support.
- Stir liquids while heating to distribute temperature evenly.
- Use tongs or gloves to move the glass beaker.
Proper handling keeps you and your lab environment safe.
Beaker Drawings in Science Textbooks
The beaker drawing is not only a diagram but a part of basic science education. Students use it to understand structure and to label parts during exams. Textbooks show both beaker diagram and beaker image examples to strengthen learning through visuals.
Beakers and Other Lab Equipment
A beaker often works with other tools:
- Test tubes
- Pipettes
- Funnels
- Measuring cylinders
- Conical flasks
Each has a unique function, but the beaker remains the most frequently used container. It supports almost every process in liquid handling.
Digital Learning and Beaker Images
Today, many science apps and e-learning platforms include beaker image libraries. These help students study from home. By clicking on a beaker image, users can zoom in, rotate, and explore its parts interactively.
Digital beaker diagrams also simplify online teaching, helping instructors explain practical topics through visuals.
Summary of Beaker’s Importance
A beaker is the foundation of every laboratory. Its design, structure, and versatility make it indispensable for research and education. From the beaker diagram to beaker drawing and beaker image, every representation strengthens understanding.